New flyscreen for the bathroom
This was a little project I'd been putting off for quite some time. When we moved in, the flyscreen had a fairly large flap ripped into its bottom corner -- as if someone had aimed a chest-high spinning roundhouse kick at it.
Perhaps that kick had been motivated by frustration from a previous attempt at getting the frame out of the window -- which I soon found to quite a fiddly business. In the end, the previous frame was "compromised" and the project expanded into constructing a new frame from scratch. I had learned the hard way that the screen is designed to be removed from the inside (duh!).
Building a new frame and installing the flyscreen wasn't too big a job in the end. It required a couple of specialized tools: a plastic "mitre" which allows the cutting of the frame at a precise 45 degree angle with a hacksaw; and a "spline roller" which, as the name suggests, rolls the rubber spline into the groove thereby clamping the flywire in place (TIP: while doing this, clothes pegs are a good way to clamp the wire onto the frame at reasonable tension). The frame segments are held together by little plastic corner elements (invisible in the final product). I also added a little plastic handle doo-da at the bottom to facilitate lifting out the flyscreen (without breaking it) if that ever proves necessary.

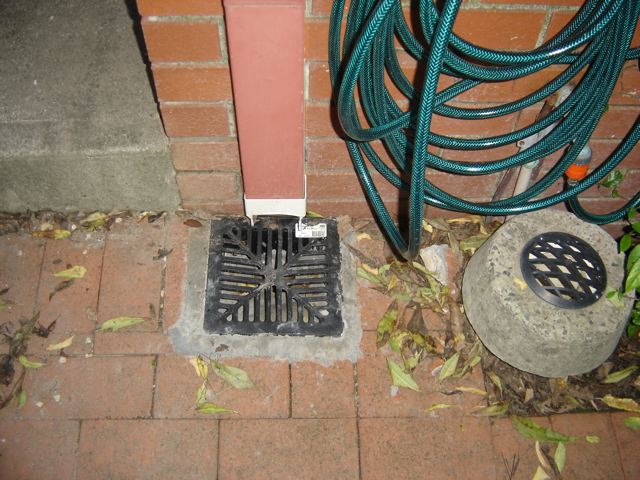
Finally got these done by the plumber: a big metal one at the back and a smaller plastic one at the front. The previous set-up had pipes from the downspouts straight underground to the stormwater drain. This was potentially dangerous if ever this were to become blocked, since there would then be nowhere for the water to escape other than under the house.
Although the end result is functional, I'm not blown away by the workmanship. I think if I had to do this again I'd be happy to have a stab at it myself. The only really tricky bit would be sawing the concrete path to make room for the pit.

Retaining wall drainage
Last weekend I finally completed this long-running project.
For the smaller section of retaining on the right side, I ended up inserting the new ag pipe introvenously into the older one and then laying it along the top along the length of the wall:

Just for good measure, I also surgically inserted the leftover bit of ag pipe so that it runs almost vertically into the old pipe, since this corner had been particularly boggy before:

Then came the fun part: back-filling the cavity behind the wall with a mixture of blue metal stones, old bricks and bits of sandstone that had been there previously, as well as a lot of the clay-ish soil that has been piling up from other excavations around the place (the idea being to have bricks/rocks immediately behind the wall to a thickness of about 30cm, and then soil from there to the rock face). This was tedious, particularly since, in order to protect the new drainage system from getting clogged up with clay particles (which had been the undoing of the previous one), I was wrapping the stones and brick in landscape fabric (a deceptively tough felt-like material that lets water, but not sand or soil, pass through).
So here is the end result:


Next step: planter boxes will be set up in the area behind the retaining walls, and some decorative gravel will fill in the remaining spaces. Further down the line will be a gravel drain in front of the retaining wall, which will be linked up with the metal pit mentioned above.
And then maybe I'll stop thinking about drainage for a while, which will be nice for all concerned. Because you know things have gone too far when you find yourself stopping in the middle of a carpark to mutter, with knowing admiration, "boy, that's a good-sized drain...".


No comments:
Post a Comment